Windows® PC
On the Xbox Family Settings App
- Select your child under Your Family.
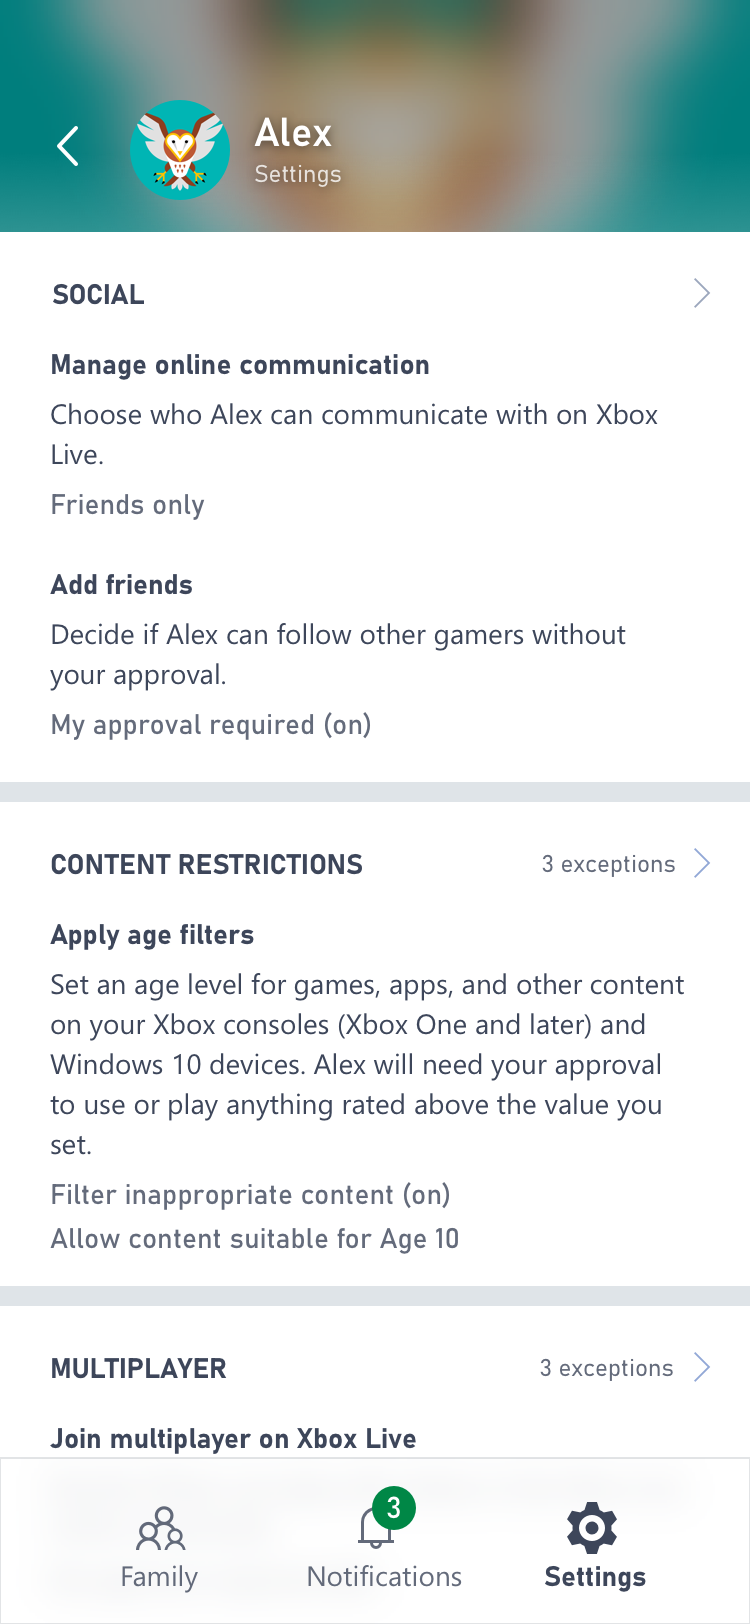
- Select Content Restrictions.
- Make sure Filter Inappropriate Content is toggled to the On.
- Select Allow Content Suitable for Age and confirm the age of your child.
- This setting will block potentially inappropriate games based on the ESRB rating information. For example, if your child is 9-years-old they will be able to play games with the E for Everyone rating assignment. If they are 11-years-old they will have access to games rated E for Everyone and Everyone 10+, and so on.
Note: Via the app parents can also individually allow or block individual game titles, regardless of rating. Children will not have access to these games without parental confirmation. These setting affects the child’s use of Xbox consoles (Xbox One and later) and Windows 10 devices.
At the Microsoft Family website
- Sign in at family.microsoft.com.
- Under the child whose profile you’re here to customize, select More options > Content restrictions.
- Turn on the setting Block inappropriate apps, games & media.
- Set an appropriate age for content in the control Allow apps and games rated for.
- This setting scales across content types—games, apps, movies & TV, and music—to what’s considered appropriate for a given age based on ESRB and other content rating systems. For example, the setting for 11-year-olds allows playing games rated up to E10+ but not T or M.
- To see which content ratings are allowed for a given age, select View allowed ratings.
- To block specific games and apps:
- Just below your child’s profile info, select Activity.
- Select Manage, then turn on Activity reporting. This tracks your child’s activity on Xbox consoles (Xbox One and later), Windows 10 devices, and Android devices running Microsoft Launcher.
- Once the apps and games list shows what your child is using, you’ll be able to selectively block any that you don’t want them using.
- Sign in at family.microsoft.com.
- Under the child whose profile you’re here to customize, select More options > Spending.
- Choose whether to require approval for purchases and whether you want an email when the child buys something.
- Finally, to add money to the child’s account for spending without approval, choose Add money and specify an amount to add.
Note: This setting applies to activity on Xbox consoles (Xbox One and later) and Windows 10 devices.
On the Xbox Family Settings App
- Select your child under Your Family.
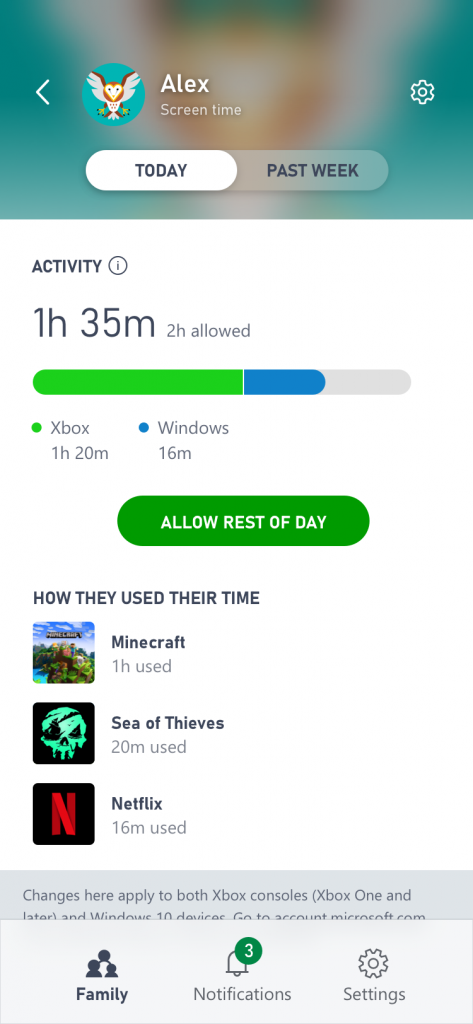
- Select Screen Time.
- Under Schedule select the bar under Day to access screen time options.
- Under Days of the Week select the days for which you’d like to set screen time limits. You may select more than one at a time. Then select Save.
- Under Time Limit select the amount of time you feel is appropriate to designate for playing games. Then, select Save.
- Under Time Range you can set time-frames for when during the day your child has access to play their games. Then, select Save.
- Parents can remotely extend play time via the app if their child requests.
Note: This setting affects the child’s use of Xbox consoles (Xbox One and later) and Windows 10 devices.
At the Microsoft Family website
- Sign in at family.microsoft.com.
- Choose a child’s profile and select More options > Screen time.
- To make your child’s schedule for Xbox One consoles match the schedule for Windows 10 devices, turn on Use one schedule for all devices.
- Set limits for each day of the week.
- To set limits for time spent in specific games and apps, select More options > App and game limits and turn them on.
- If needed, follow the on-screen instructions to add devices. Games and apps in use will appear here; turn on filters for the games or apps for which you want to manage screen time.
Note: This setting affects your child’s use of Xbox consoles (Xbox One and later) and Windows 10 devices.
On the Xbox Family Settings App
- Select your child under Your Family.
- In the top right corner, next to your child’s name, select the settings symbol.
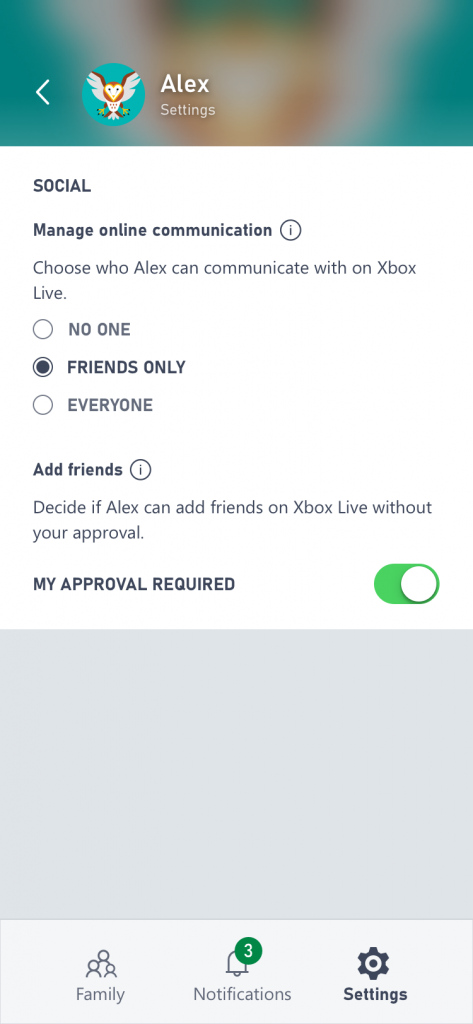
- Under Social select Manage online communications, then select with whom your child can interact:
- Everyone – this means anyone signed into the Xbox online community.
- Friends Only – Friends are anyone you have approved of adding to your child’s Xbox Live friends list.
- No One – Your children won’t receive any voice or text communications or invites.
- If you would like to give your child the ability to add friends without your approval, select Allow under Add Friends.
- On the previous page, under Multiplayer select Join multiplayer on Xbox Live.
- If you would like your child to have the ability to play with others in the Xbox online community without parental permission, select Allow. You can also allow this for individual games.
- On the previous page, under Cross-Network Play, select Join cross-network play.
- If you would like to give your child the ability to play with players on other gaming services outside of Xbox Live select Allow.
Note: This setting affects the child’s use of Xbox consoles (Xbox One and later) and Windows 10 devices.
Follow the steps below on this page, or in the downloadable guide to the right, to help ensure your children can only access content that is appropriate for them.
Setting Windows PC Parental Controls Instructions:
On the Xbox Family Settings App
- Select the Xbox Family Settings app.
- Select your child under Your Family.
- Manage settings including:
- Content Restrictions – Block games based on the ESRB-assigned rating information
- Screen Time – Manage when, and for how long, your child can play games
- Communications – Manage with whom (if anyone) your friends can play online
How to Set Parental Controls in Windows 10:
Note: Windows 10 requires that children are set up with a Microsoft Account to be added to a Microsoft Family. This is outlined in the steps below.
First, set up a Microsoft Account HERE.
- This will give you access to the Windows Parental Controls for all Microsoft products.
Add a child to your family Microsoft account
- Sign in at account.microsoft.com/family.
- Sign in with your Microsoft account, then select “Add a family member”.
- Select “Child” or “Adult”.
- Type an email address or mobile phone number for the person you want to add and select “Send invite”. If your child doesn’t have an email account or mobile number, select “Create a new one for them” and follow the steps on screen.
- Have the person you’ve invited accept your invitation from their email or text message, or go to account.microsoft.com/family and select “Accept now” next to their email address. You can find it in the “Notifications section” at the top of the page under “Pending member”.
- If you selected “Accept now”, sign out so the person you’re trying to add can sign in and join the family. Then, sign back in and finish setting things up.
Tip
Is your child too young to remember a typed password? You might want to set up a picture password for them, so they can sign in using a favorite photo instead.
After your child is added to your family you will have a number of options for parental controls you can access by signing into your Microsoft account and following the links beneath your child’s name, including:
- “Activity” lets parents look at what their child has been doing on their devices, including snapshots of their searches, browsing history, the apps and games they’ve been playing and how much time they’ve spent in front of the screen.
- “Screen time” allows parents to manage how much time their child can spend on the computer every day.
- “Content restrictions” provides parents with several methods of managing their child’s access to content. Parents can require permission before making a purchase on the Microsoft Store or manage access to potentially inappropriate apps, games and other forms of media based on the age rating of the product and the age of the child.
- “Spending” allows parents to review past purchases and add money to a child’s Microsoft account, giving them the freedom to make responsible purchasing decisions within boundaries. Note that even with money in their Microsoft account, children will be barred from purchasing content rated above their age level.
NOTE: Account holders will always receive and email notification when a purchase is made from the Microsoft Store.